What Is A 2d Drawing Example
7
2D Drawing
Drawing Definitions
An Gaelaras- O'Donnell/Tuomey
Some brief definitions of different types of drawing used by architects
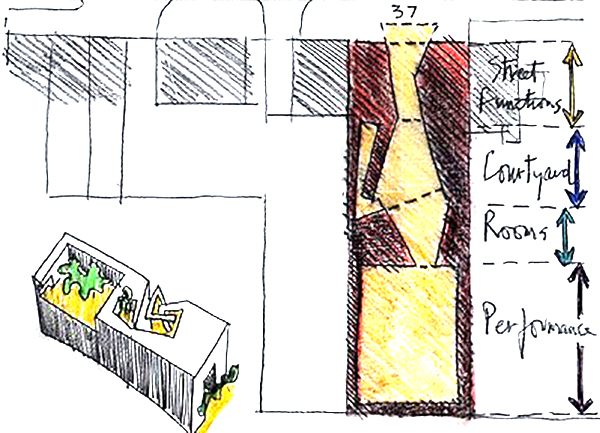
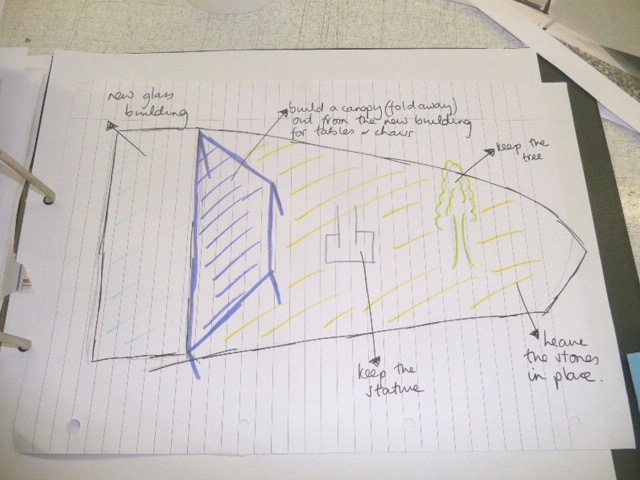
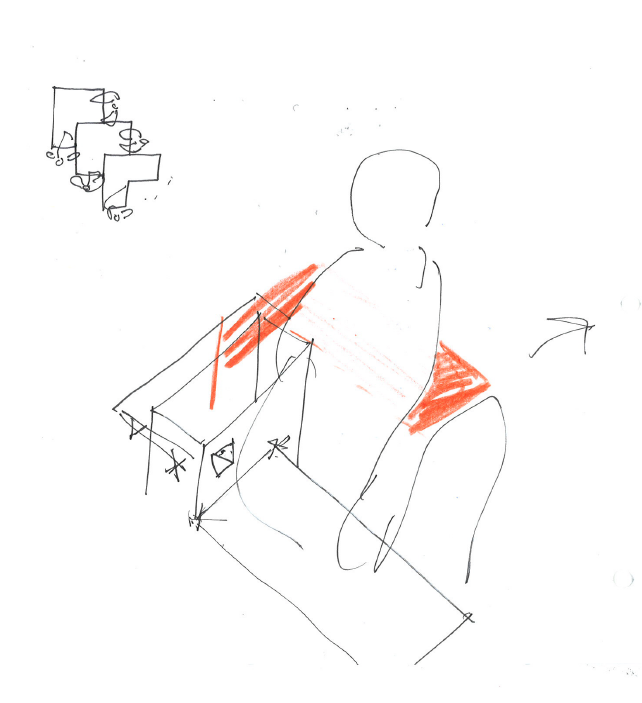
Concept sketch:
- Is a free hand drawing which quickly depicts and portrays ideas and their development.
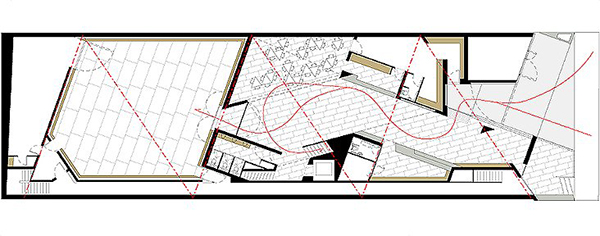
Floor Plan:
- Is a simple line drawing of a room or building drawn as though seen from above (a bird's eye view) normally containing walls, doorways, windows and built-in fixtures. A plan is an architect's term for a map of buildings and other sites which are measured and drawn to scale.
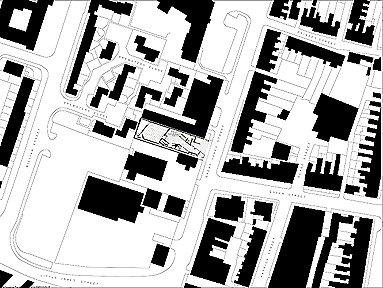
Site Plan:
- Is a specific type of plan which shows the context of a building including (property) boundaries, access to site and surrounding structures.
Elevation:
- Is a view of a building as seen from on side either internally and externally which includes doorways, windows and any additional features.
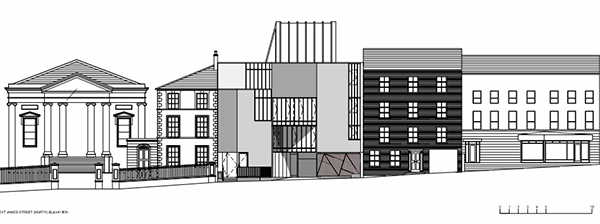
Section:
- A view of a "slice" through a building to illustrate spatial relationships between objects within a space — for example, walls and furniture in buildings, parts of a plant stem, landscape or elevation of a building.

The whole idea behind creating scale drawings is to allow the drafter to create a drawing that is proportionately the same as the object/building it represents.
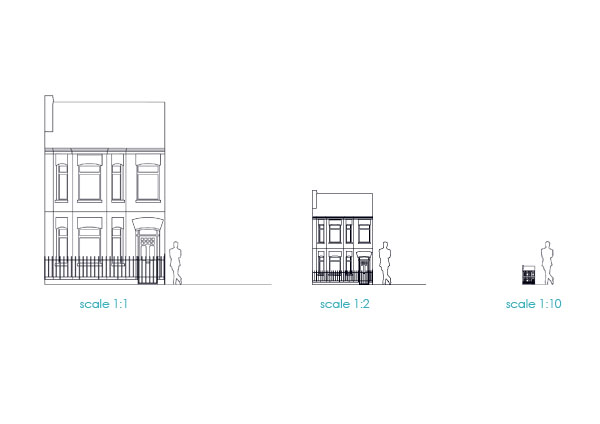
What is a scale drawing?
A drawing that shows a real object with accurate sizes except they have all been reduced or enlarged by a certain amount.
The length in the drawing : The matching length on the real thing
For Example
- Scale 1:1
1 mm on paper = 1 mm on the building
- Scale 1:2
1 mm on paper = 2 mm on the building
- Scale 1:10


1 mm on the paper = 10 mm on the building
Using a scale ruler
Using scale ruler we can create accurate drawings of both very large objects or very small objects that fit onto a standard size piece of paper. The scale rulers shown below are used for scaling larger objects, which would be drawn in meters.
Look at the scale ruler labelled 1:200. Imagine you lay this on a piece of paper and drew a line from 0 to 5. This line would be 5 m long at the scale of 1:200.
See if you can draw a 5 m line at 1:500
To practice, why not draw a plan of your classroom at 1:100? For some tips on how to draw a plan see below.
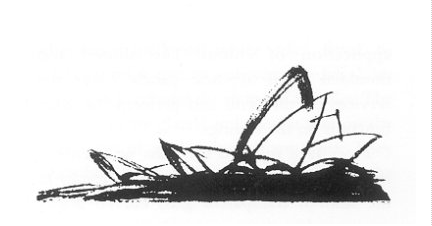
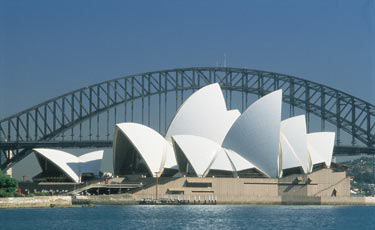
Concept Sketch……….A thought on paper! You don't need a "how to" guide here – just let your ideas take shape. Don't worry about what your drawings look like at this stage -its all about getting ideas down on paper. You can learn more about technical drawing in later sections. Here are some examples of Concept Sketches:
What you'll need:
- Flat surface, such as a drawing board or table, piece of card or clip board.
- Pencils of various grades.
- Colouring pencils, markers, pastels, paint (water colour, acrylic)
- Pencil eraser, sharpener.
- Paper, various textures, perhaps recycled from the school classroom, office, local printer, newspaper
Here are some tips to get started on drawing:
- Gather all the materials you think you will need to make your sketch drawing. Remember you can sketch anywhere, at a table, in the park or on the street and on anything, sketchbook, paper, recycled card or napkin.
- Practice some hand movement before you start to warm up by drawing circles and lines for a few minutes.
- To begin, use light gentle pencil strokes with loose hand movements, allowing your hand to move quickly, with little pressure, gliding over the page to leave a light drawing foundation.
- Next use a darker grade or coloured pencil or pen to define the outline, adding gradually detail and inner shapes.
- Keep adding further details, perfecting your lines until you feel satisfied that you have captured a perfect representation.
Tips:
- You may want to try a number of different versions of the same image to initially brainstorm and then you can decide later which is the best representation.
- You can add shadows or definitions at the end of the process to add depth to your drawing.
- Free you mind, let the picture come out!
- Take your time, building up light strokes at first.
- Keep practicing, don't worry if your sketches are not perfect at first, they will improve with time.
- Experiment by doodling, with colour and textures.
How to: make a collage
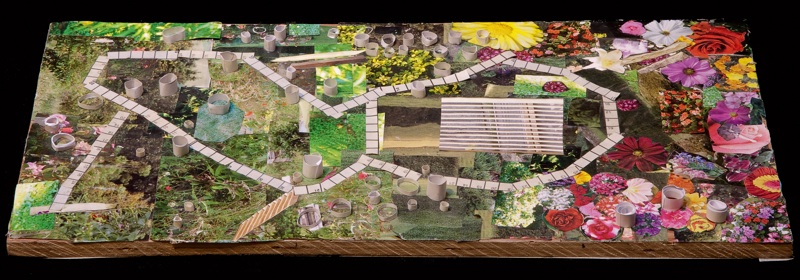
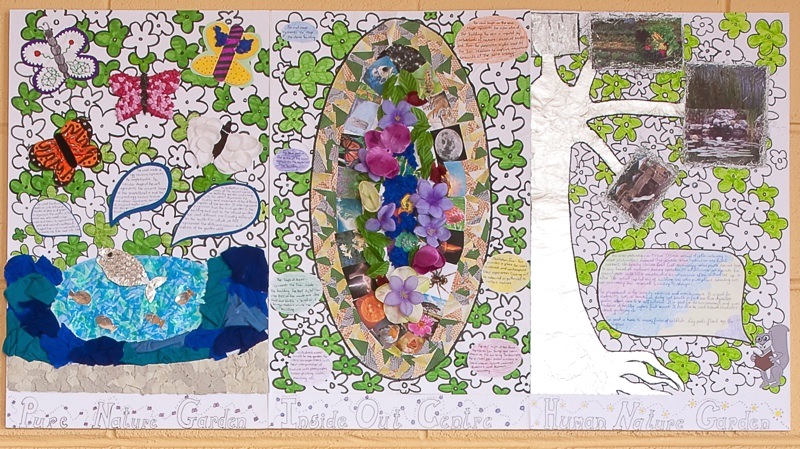
A collage is made by assembling a selection of ready-made materials to create a new image. Materials such as paper, card, magazine cut-outs, natural or recycled items can be used. Its a useful creative tool as you can move shapes, colours and textures around before deciding on the final arrangement and glueing it together. Collage can be combined with drawing as a way to add references to particular textures or colours.
Tips:
- Make your collage however and with whatever you want, be creative and experiment with different techniques, items and images.
- Use a backing material such as cardboard or strong paper.
- If materials do not stick after gluing, brush a diluted glue mixture (three parts water to one part glue) over your whole collage and set aside to dry over night.
What you'll need:
- Glue or paste.
- Scissors or craft knife.
- A base for your collage. as mentioned before. ( thick paper or card, old book covers, fabric, recycled wood or metal sheets) It is key that the surface is relatively flat for sticking items to it.
- Materials:
- Print: images, words, letters, magazine cutouts, stickers, paper, stamps, wallpaper.
- Natural: shells, leaves, moss, flowers, bark, twigs, stones, sand, wood, seeds, eggshells.
- Fabric: old t-shirts, jeans, tablecloth, curtains, samples.
- Recycled: nuts, bolts, nails, buttons, plastic, foil, labels, lids, matchsticks, corks.
- Photo editing software such as photoshop illustrator, publisher (for digital collage)
- Rubbish bin
Link: sample different styles of Collage
How to: Draw in perspective
One Point Perspective
What you'll need:
- Pencil
- Paper
- Ruler
- Set Square
- Rubber
- Draw the end wall of the room in correct proportion. In this example the width is 8cm and the height is 6cm.
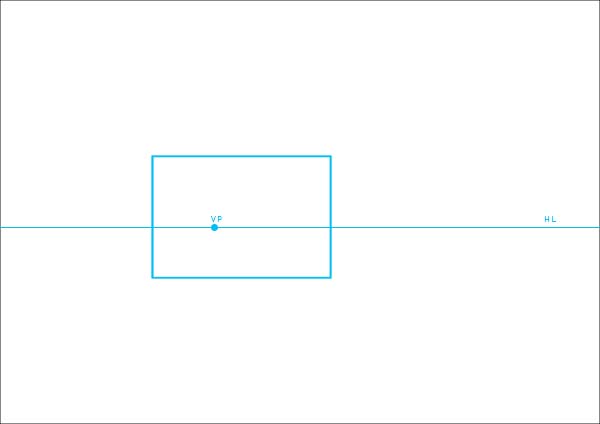
Lightly draw the horizon line (HL) across the page. The HL is the height of your eye above the floor. Mark the vanishing point (VP) on the horizon line. The VP represents the viewer of the scene relative to the side walls.
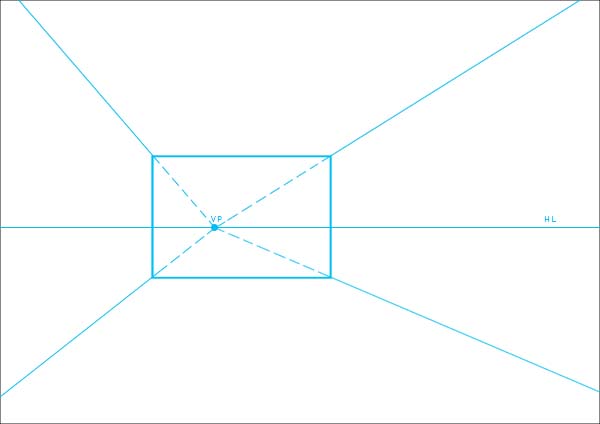
Lightly draw lines from the VP through the four corners of the end wall. Then extend them heavily to edges of the paper. The heavier portions of the lines depict the outer limits of the space.
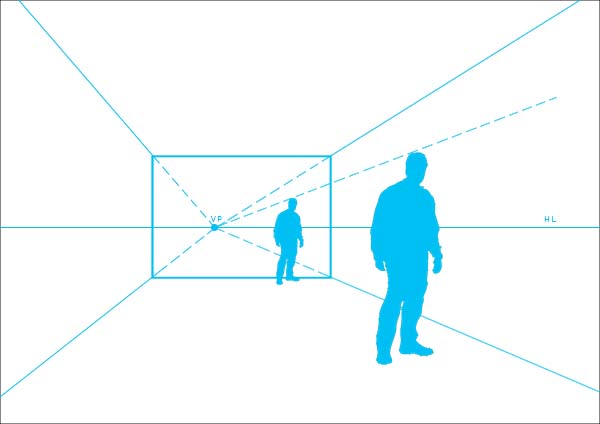
To include a person in the drawing, mark the height of a person on the back wall, indicated here as a silhouette. From the VP draw a line out to touch the top of the persons head and extend out. This line represents the height of the person and therefore you can add in a person at any point along this line.
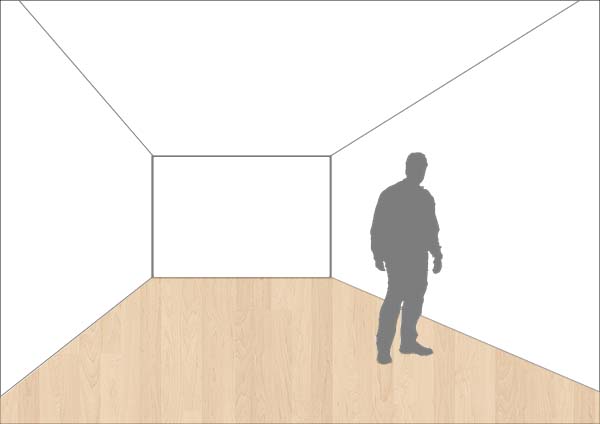
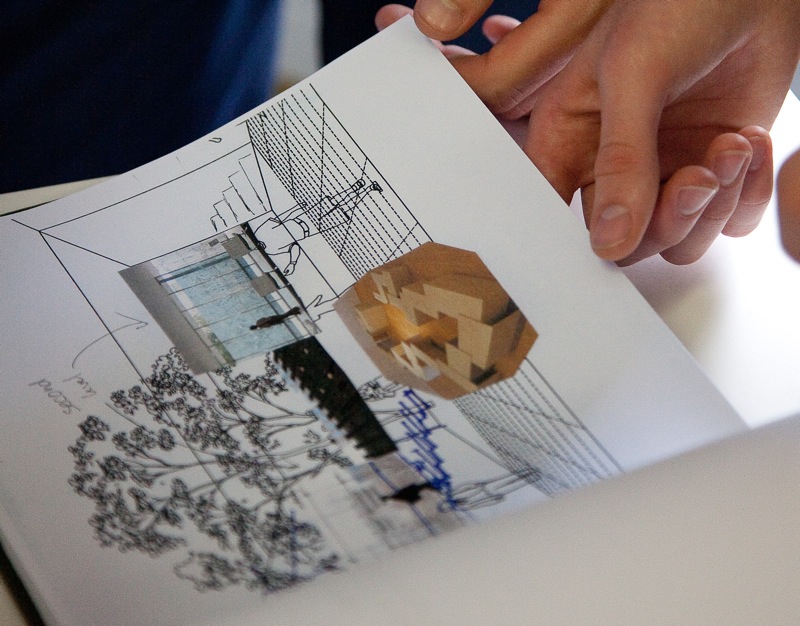
To finish the drawing you can add collage and further detail.
Two Point Perspective

1. Draw a line to represent the horizon line, which is the eye line of the viewer.
2. Mark two vanishing point, one on the left and one on the right.
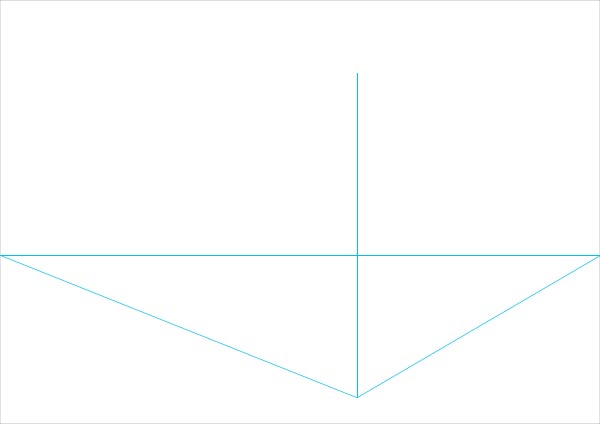
3. Choose two vanishing points along the horizon line. From these points draw a line to intersect with the vertical line.
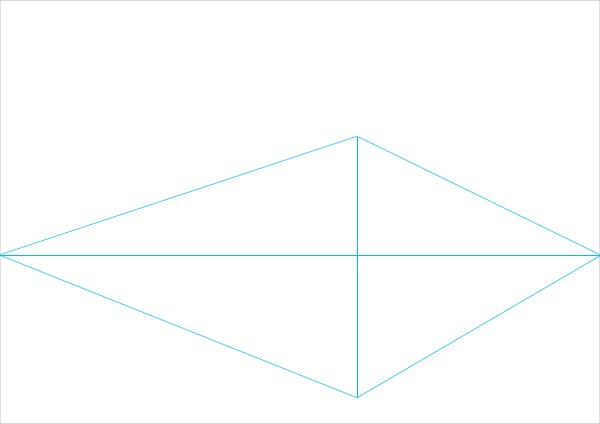
4. Repeat the steps, always projecting the top and bottom of the line back to the vanishing points.
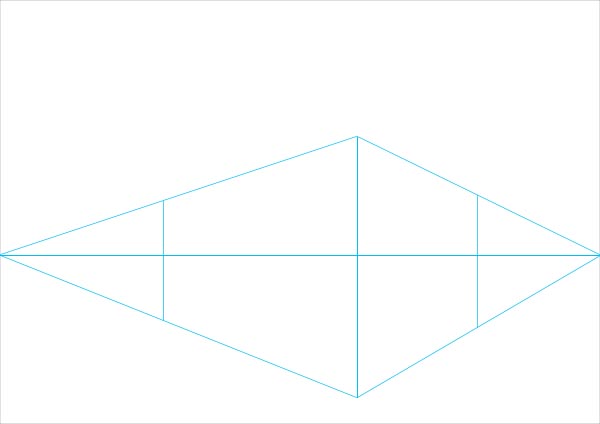
5. Draw two more vertical lines to represent the other corners of the building
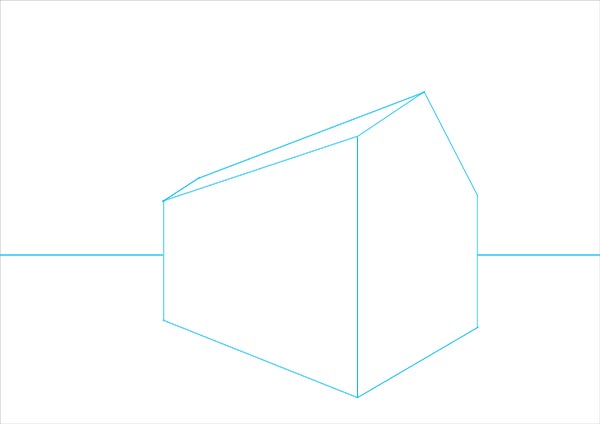
6. Now you know the basics, you can trace over the drawing to transform it into whatever you want. A rectangle becomes a house.
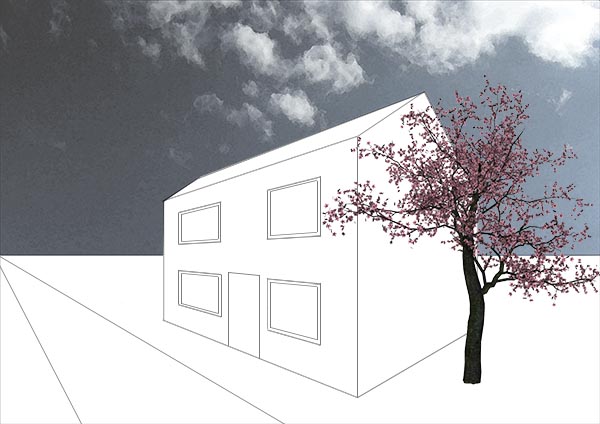
7. Add collage and detail to finish the drawing.
More on Perspective here
How to: Draw a Plan
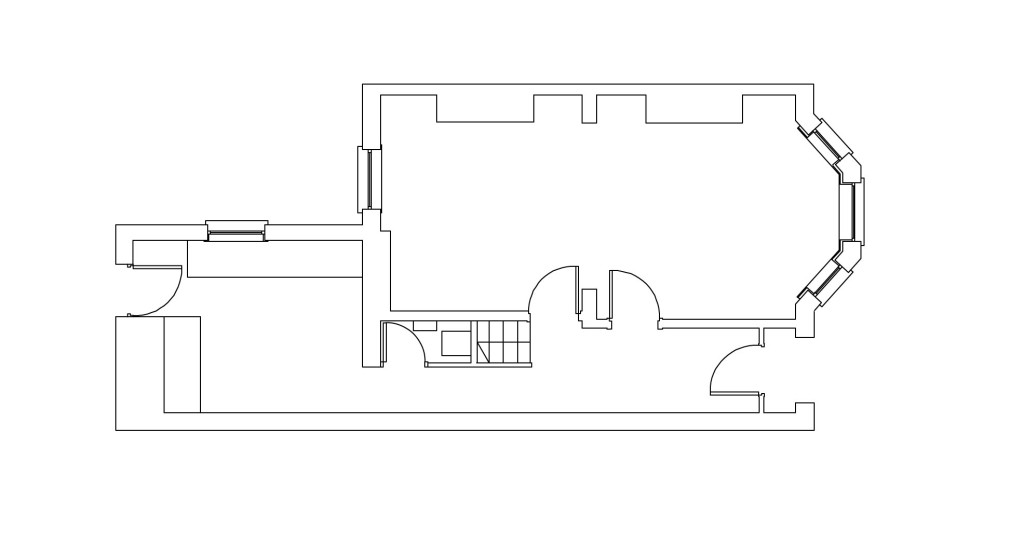
Measure your outside or boundary lines as accurately as possible. Always use double lines to indicate a solid being cut through.
Note: Solids are usually structural elements. If you are trying to decide what should be included – Imagine you are standing in the space you wish to draw, include everything that is being cut through about a meter above ground level or waist height. Once all of the outlines are drawn add details such as openings – windows, doors and stairs. Using thinner/lighter lines insert non structural parts such as internal walls. At this stage all of the major elements are drawn. You can choose the level of detail you add such as adding furniture, fixtures and fittings. Colour and materials can also be added if you feel it is appropriate.
How to: Draw a Section
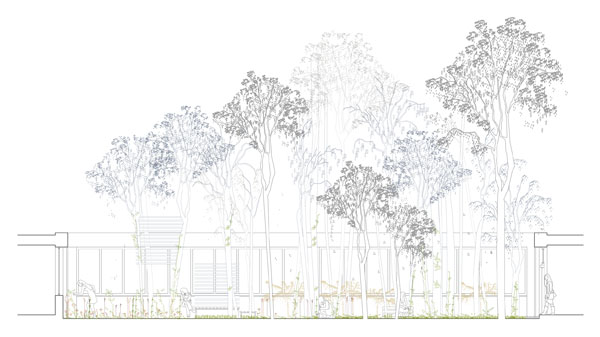
A section drawing is a imagined 'slice' through a building. A section allows you to describe the relationship between interior spaces, exterior spaces and floor levels. Identify the area in the design you want to investigate further. Using your plan, draw a line through the area of study. This line represents the 'slice' you are taking through the space. Using light lines, project the points in plan that intersect with the 'slice'. A quick survey of the building will get you the floor to ceiling height of the spaces.
Useful Images
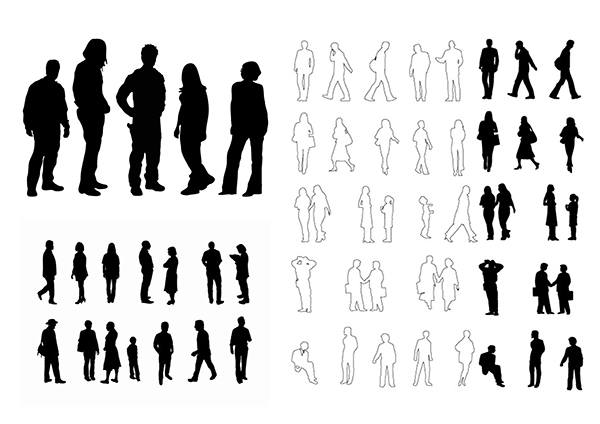
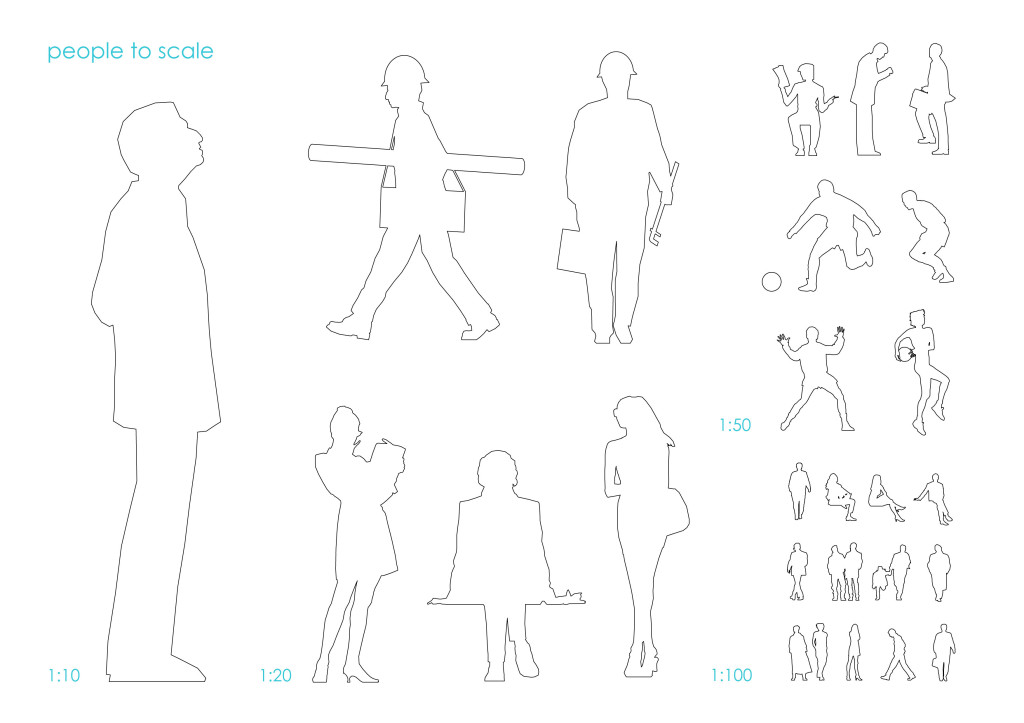
Drawing Definitions
An Gaelaras- O'Donnell/Tuomey
Some brief definitions of different types of drawing used by architects
Concept sketch:
- Is a free hand drawing which quickly depicts and portrays ideas and their development.

An Gaeláras Sketch
Floor Plan:
- Is a simple line drawing of a room or building drawn as though seen from above (a bird's eye view) normally containing walls, doorways, windows and built-in fixtures. A plan is an architect's term for a map of buildings and other sites which are measured and drawn to scale.

An Gaeláras First Floor
Site Plan:
- Is a specific type of plan which shows the context of a building including (property) boundaries, access to site and surrounding structures.

An Gaeláras Site plan
Elevation:
- Is a view of a building as seen from on side either internally and externally which includes doorways, windows and any additional features.

An Gaeláras Elevation
Section:
- A view of a "slice" through a building to illustrate spatial relationships between objects within a space — for example, walls and furniture in buildings, parts of a plant stem, landscape or elevation of a building.

An Gaeláras Section
What is Scale?
The whole idea behind creating scale drawings is to allow the drafter to create a drawing that is proportionately the same as the object/building it represents.

What is a scale drawing?
A drawing that shows a real object with accurate sizes except they have all been reduced or enlarged by a certain amount.
The length in the drawing : The matching length on the real thing
For Example
- Scale 1:1
1 mm on paper = 1 mm on the building
- Scale 1:2
1 mm on paper = 2 mm on the building
- Scale 1:10
1 mm on the paper = 10 mm on the building
Using a scale ruler
Using scale ruler we can create accurate drawings of both very large objects or very small objects that fit onto a standard size piece of paper. The scale rulers shown below are used for scaling larger objects, which would be drawn in meters.
Look at the scale ruler labelled 1:200. Imagine you lay this on a piece of paper and drew a line from 0 to 5. This line would be 5 m long at the scale of 1:200.

See if you can draw a 5 m line at 1:500

To practice, why not draw a plan of your classroom at 1:100? For some tips on how to draw a plan see below.
How to: Sketch
Concept Sketch……….A thought on paper! You don't need a "how to" guide here – just let your ideas take shape. Don't worry about what your drawings look like at this stage -its all about getting ideas down on paper. You can learn more about technical drawing in later sections. Here are some examples of Concept Sketches:

Sketch by Cork TY student

Sketch by Dublin TY student

Architect Jorn Utzon's sketch for Sydney Opera House
The finished building
What you'll need:
- Flat surface, such as a drawing board or table, piece of card or clip board.
- Pencils of various grades.
- Colouring pencils, markers, pastels, paint (water colour, acrylic)
- Pencil eraser, sharpener.
- Paper, various textures, perhaps recycled from the school classroom, office, local printer, newspaper
Here are some tips to get started on drawing:
- Gather all the materials you think you will need to make your sketch drawing. Remember you can sketch anywhere, at a table, in the park or on the street and on anything, sketchbook, paper, recycled card or napkin.
- Practice some hand movement before you start to warm up by drawing circles and lines for a few minutes.
- To begin, use light gentle pencil strokes with loose hand movements, allowing your hand to move quickly, with little pressure, gliding over the page to leave a light drawing foundation.
- Next use a darker grade or coloured pencil or pen to define the outline, adding gradually detail and inner shapes.
- Keep adding further details, perfecting your lines until you feel satisfied that you have captured a perfect representation.
Tips:
- You may want to try a number of different versions of the same image to initially brainstorm and then you can decide later which is the best representation.
- You can add shadows or definitions at the end of the process to add depth to your drawing.
- Free you mind, let the picture come out!
- Take your time, building up light strokes at first.
- Keep practicing, don't worry if your sketches are not perfect at first, they will improve with time.
- Experiment by doodling, with colour and textures.
How to: Make a Collage

Collage by TY students from Mercy College Coolock
A collage is made by assembling a selection of ready-made materials to create a new image. Materials such as paper, card, magazine cut-outs, natural or recycled items can be used. Its a useful creative tool as you can move shapes, colours and textures around before deciding on the final arrangement and glueing it together. Collage can be combined with drawing as a way to add references to particular textures or colours.

Combined drawing and collage work, by St. Patrick's College Cavan TY students.
Tips:
- Make your collage however and with whatever you want, be creative and experiment with different techniques, items and images.
- Use a backing material such as cardboard or strong paper.
- If materials do not stick after gluing, brush a diluted glue mixture (three parts water to one part glue) over your whole collage and set aside to dry over night.
What you'll need:
- Glue or paste.
- Scissors or craft knife.
- A base for your collage. as mentioned before. ( thick paper or card, old book covers, fabric, recycled wood or metal sheets) It is key that the surface is relatively flat for sticking items to it.
- Materials:
- Print: images, words, letters, magazine cutouts, stickers, paper, stamps, wallpaper.
- Natural: shells, leaves, moss, flowers, bark, twigs, stones, sand, wood, seeds, eggshells.
- Fabric: old t-shirts, jeans, tablecloth, curtains, samples.
- Recycled: nuts, bolts, nails, buttons, plastic, foil, labels, lids, matchsticks, corks.
- Photo editing software such as photoshop illustrator, publisher (for digital collage)
- Rubbish bin
Link: sample different styles of Collage

Collage by students of St. Mary's SS Mallow
How to: Draw in perspective
One Point Perspective What you'll need
- Pencil
- Paper
- Ruler
- Set Square
- Rubber
Step 1
1. Draw the end wall of the room in correct proportion. In this example the width is 8cm and the height is 6cm.

Step 2
2. Lightly draw the horizon line (HL) across the page. The HL is the height of your eye above the floor. Mark the vanishing point (VP) on the horizon line. The VP represents the viewer of the scene relative to the side walls.

Step 3
3. Lightly draw lines from the VP through the four corners of the end wall. Then extend them heavily to edges of the paper. The heavier portions of the lines depict the outer limits of the space.

Step 4
4. To include a person in the drawing, mark the height of a person on the back wall, indicated here as a silhouette. From the VP draw a line out to touch the top of the persons head and extend out. This line represents the height of the person and therefore you can add in a person at any point along this line.

Step 5
5. To finish the drawing you can add collage and further detail.
Two Point Perspective

Step 1
1. Draw a line to represent the horizon line, which is the eye line of the viewer.
Step 2
2. Mark two vanishing point, one on the left and one on the right.

Step 3.
3. Choose two vanishing points along the horizon line. From these points draw a line to intersect with the vertical line.

Step 4
4. Repeat the steps, always projecting the top and bottom of the line back to the vanishing points.

Step 5.
5. Draw two more vertical lines to represent the other corners of the building

Step 6.
6. Now you know the basics, you can trace over the drawing to transform it into whatever you want. A rectangle becomes a house.

Step 7.
7. Add collage and detail to finish the drawing.
More on Perspective here
How to: Draw a Plan
1. Measure your outside or boundary lines as accurately as possible. Always use double lines to indicate a solid being cut through.
Note: Solids are usually structural elements. If you are trying to decide what should be included – Imagine you are standing in the space you wish to draw, include everything that is being cut through about a meter above ground level or waist height.
2. Once all of the outlines are drawn add details such as openings – windows, doors and stairs.
3. Using thinner/lighter lines insert non structural parts such as internal walls. At this stage all of the major elements are drawn.
4. You can choose the level of detail you add such as adding furniture, fixtures and fittings. Colour and materials can also be added if you feel it is appropriate.

How to: Draw a Section
A section drawing is a imagined 'slice' through a building. A section allows you to describe the relationship between interior spaces, exterior spaces and floor levels.
1. Identify the area in the design you want to investigate further.
2. Using your plan, draw a line through the area of study. This line represents the 'slice' you are taking through the space.
3. Using light lines, project the points in plan that intersect with the 'slice'. A quick survey of the building will get you the floor to ceiling height of the spaces.

Useful Images
What Is A 2d Drawing Example
Source: http://www.mydesignjournal.ie/students/2d-drawing/
Posted by: lopezwavers.blogspot.com

0 Response to "What Is A 2d Drawing Example"
Post a Comment